CLPM Tutorial
Eric Timmons
[email protected]
Intro to CLPM
What is it?
CLPM stands for Common Lisp Project Manager.
CLPM has several primary goals:
- Manage dependencies in both global and project specific contexts.
- Use existing libraries where possible.
- Support HTTPS.
- Do as little work as possible in the development image.
Terminology
Below are some common terms used by CLPM and in this tutorial:
- Package
- This is typically used in the colloquial sense, meaning some unit of software that is installed. There is an unfortunate collision with Common Lisp's packages, but hopefully what is meant is clear based on context.
- System
- An ASDF defined system.
- Project
- Primary development unit of code. Typically corresponds to the contents of a single VCS repository. May contain multiple systems.
Terminology
- Release
- A versioned snapshot of a project.
- System release
- A snapshot of a system contained within a project's release.
- Source
- Typically used to refer to a repository of projects, releases, and metadata, such as Quicklisp.
- Context
- A set of requirements and installed releases that satisfy said requirements.
Architecture
Two major pieces:
- CLPM
- The core of the project manager, intended to be run in a separate process. Additionally, has a command line interface for use outside of Lisp.
- CLPM Client
- A small, portable system meant to be loaded into development images. Launches CLPM processes and communicates with them using a REPL.
Architecture Benefits
This architecture is different from existing solutions (see: Quicklisp, Qlot, and Qi). It gives us some very nice benefits, though:
- CLPM can load and use foreign libraries you likely do not need in your development image (such as OpenSSL).
- CLPM can use existing libraries without bloating your image or dumped executable footprint.
- CLPM can use existing Lisp libraries without introducing version or package conflicts in your development image.
- CLPM can take advantage of implementation specific features without sacrificing portability.
Contexts
CLPM supports two types of contexts.
Global Contexts
Global contexts have a name and all information about these contexts is stored in the CLPM data directory.
Similar in spirit to Python virtualenvs (at least those created with virtualenvwrapper).
Additionally, can write information to standard ASDF source-registry
locations (see: (:contexts "NAME" :source-registry-files) config option),
so ASDF can find the systems without involving CLPM at all. Great for
installing libraries for global use or when working on projects by
yourself.
Bundle/Anonymous Contexts
Identified by a pathname, typically to a file named clpmfile.
Designed to be portable, so it can be shared (e.g., in a git repo):
clpmfilecontains sources and top-level requirements.clpmfile.lockcontains the same information, but also includes the set of releases that satisfy the requirements.clpmfile.lockis enough to recreate the context on another machine.
Project local configuration of CLPM (such as overriding git checkouts to
use a copy you already have cloned) accomplished using a file
.clpm/bundle.conf (relative to clpmfile).
Inspired by Ruby's Bundler and Qlot. Great for working on a project with many collaborators and deploying projects using a known, working configuration.
Requirements
Contexts are specified by the user via requirements. CLPM understands
several types, described below. The included examples show how to specify
that requirement in a clpmfile.
System requirement
A system requirement says that a specified system and all its dependencies must be available in the context. Can specify:
- A version range (refering to the ASDF parsed system version). However, this is not currently available for Quicklisp sources as that data is not present in the metadata.
- The source from which to install the system.
(:system "fiveam")

(:system "cffi"
 :version ((>= "0.20.0")))
Project requirement
A project requirement says that all of a project's systems, and all of the dependencies of its systems must be available in the context. Can specify:
- A version range, refering to the version number of the release, which may or may not correspond to the version of any system contained in the release (depending on the project developer's practices). For Quicklisp sources, the release version is date based.
- The source from which to install the project.
(:project "fiveam")

(:project "cffi"
 :version ((>= "2018-10-20")))
VCS Project requirement
Similar to a project requirement, except it states that the project must be checked out from version control. Can specify:
- Branch, tag, or commit.
- The repository (required if the source metadata does not include VCS information).
Note that any system or project directly included in the context via this type of requirement satisfies any version constraint specified by other explicit or implicit requirements.
(:project "cffi"
 :vcs (:branch "bugfix-1"))

(:github "cffi"
 :branch "bugfix-1")
System File Requirement
This requirement states that a specified .asd file located on the local filesystem, outside of one of CLPM's directories, is included in the context, as well as any dependencies of the systems defined in it. Can specify:
- Path to the .asd file.
Note that with this type of requirement, you may need to occasionally have CLPM reresolve the requirements. For instance if you add a new dependency since the last time you asked CLPM to install things into the context. How to do this is covered in the demos below.
(:asd "super-awesome.asd")
Sources
CLPM can understand two types of sources for package metadata
Quicklisp
Quicklisp style sources are those that are also compatible with the Quicklisp library manager. These sources version releases of projects by date.
There are several disadvantages to Quicklisp sources:
- They contain no system version information.
- They routinely do not contain all the dependencies for ASDF package-inferred-systems.
- They do not contain version control information for projects.
- CLPM cannot (yet?) lazily download metadata, an explicit sync step is required that may take some time.
CLPI
CLPI based sources are defined by the CLPI Project. This source specification was created to serve CLPM's needs, so it contains the information for all of CLPM's features, and is designed to enable lazy syncing. However, it is nowhere near as mature or battle tested as Quicklisp's metadata format.
CLPI
A mirror of the main Quicklisp distribution is stored in CLPI format at http://quicklisp.common-lisp-project-index.org/. However, it is a straight translation of the Quicklisp metadata and is missing the same information. The CLPM author plans to eventually extend it to include at least better dependencies for package-inferred-systems and system version information. If you choose to use this mirror, realize that it is currently a best-effort project.
What files does it touch?
CLPM expects to read and write files in several locations on your hard drive. This section summarizes them.
Config
On non-Windows systems, CLPM's configuration is stored in the clpm/ subfolder of your XDG config
directory. On Windows, it is stored in the config/ subfolder of the clpm directory in your local app data folder. Therefore, the typical locations are:
- Linux
/home/$USER/.config/clpm/- MacOS
/Users/$USER/.config/clpm/- Windows
%LOCALAPPDATA%\clpm\config\
This can be overriden using the CLPM_CONFIG_DIRS environment variable.
Last, when using bundles, CLPM will project specific configuration from the
.clpm/bundle.conf file, relative to the clpmfile.
CLPM does not currently write to config locations, but may in future versions.
Cache
CLPM caches many files during its operation, including tarballs and project metadata.
On non-Windows systems, these files are stored in the clpm/ subfolder of your XDG cache
directory. On Windows, it is stored in the cache/ subfolder of the clpm directory in your local app data folder. Therefore, the typical locations are:
- Linux
/home/$USER/.cache/clpm/- MacOS
/Users/$USER/.cache/clpm/- Windows
%LOCALAPPDATA%\clpm\cache\
This location can be overriden using the CLPM_CACHE_DIR environment
variable.
Typically these files can be deleted any time CLPM is not running and it will recreate them as necessary.
Data
CLPM stores context data, unpacked releases, metadata for installed projects, etc. in its data directory.
On non-Windows systems, these files are stored in the clpm/ subfolder of your XDG data
directory. On Windows, it is stored in the data/ subfolder of the clpm directory in your local app data folder. Therefore, the typical locations are:
- Linux
/home/$USER/.local/share/clpm/- MacOS
/Users/$USER/.local/share/clpm/- Windows
%LOCALAPPDATA%\clpm\data\
This location can be overriden using the CLPM_DATA_DIR environment
variable.
You should let CLPM manage these files and not edit them manually.
Additional features
ASDF Groveler
When installing a release directly from version control or your file system, there is no metadata for CLPM to use in order to determine dependencies. CLPM uses the asdf-system-groveler in a separate process to extract the needed information.
Groveler Sandbox (Experimental)
Unfortunately, groveling from .asd files may involve loading arbitrary code. Therefore, CLPM is capable of using Firejail to sandbox the groveler process if it is installed. This feature is very experimental, and the CLPM author would love to have feedback on it, as well as ideas for other sandboxing methods to use!
CLPI metadata generation (Very Experimental)
CLPM has very experimental support for extracting the release metadata needed for CLPI metadata and packaging it as JSON for sending to a web service maintaining a CLPI index. The author is currently trialing this in house. Reach out if you're interested in this feature/running your own CLPI index server.
Initial Setup
Installing CLPM
Linux
- Download the latest tarball for your system. Assuming you are running an amd64 processor on most GNU/Linux distributions, it is currently located at https://files.clpm.dev/clpm/clpm-0.4.1-linux-amd64.tar.gz.
- Download the signed digests for this version from https://files.clpm.dev/clpm/clpm-0.4.1.DIGESTS.asc.
Download the CLPM Signing Key:
gpg --recv-keys 0x10327DE761AB977333B1AD7629932AC49F3044CEVerify the signature on the digests file:
gpg --decrypt clpm-0.4.1.DIGESTS.asc
Linux
Ensure the sha512 sum for the downloaded file matches the one from the digests file:
sha512sum clpm-0.4.1-linux-amd64.tar.gzUnpack the tarball:
tar xf clpm-0.4.1-linux-amd64.tar.gzInstall CLPM:
cd clpm-0.4.1-linux-amd64 && sudo sh ./install.sh
MacOS
- Download the latest tarball, currently located at https://files.clpm.dev/clpm/clpm-0.4.1-darwin-amd64.tar.gz
- Download the signed digests for this version from https://files.clpm.dev/clpm/clpm-0.4.1.DIGESTS.asc.
Download the CLPM Signing Key:
gpg --recv-keys 0x10327DE761AB977333B1AD7629932AC49F3044CEVerify the signature on the digests file:
gpg --decrypt clpm-0.4.1.DIGESTS.asc
MacOS
Ensure the sha512 sum for the downloaded file matches the one from the digests file:
sha512sum clpm-0.4.1-darwin-amd64.tar.gzUnpack the tarball:
tar xf clpm-0.4.1-darwin-amd64.tar.gzInstall CLPM:
cd clpm-0.4.1 && sudo sh ./install.sh
Windows
- Download the latest installer, currently located at https://files.clpm.dev/clpm/clpm-0.4.1-windows-amd64.msi.
- Run the installer.
NOTE: I do not think gpg is very common on Windows, but if you use it, you should be able to figure out what to do based on the instructions for other OSes.
Configuring sources
Global sources configred in sources.conf in CLPM's config directory.
The demos assume you have Quicklisp configured as a source. Described below are two options to do this. See Sources for a discussion of pros and cons of each.
Quicklisp distribution directly
Add the following to sources.conf to use the primary Quicklisp
distribution directly:
("quicklisp"
 :type :quicklisp
 :url "https://beta.quicklisp.org/dist/quicklisp.txt")
Quicklisp CLPI Mirror
Alternatively, if you like living on the edge, add the following to
sources.conf:
("quicklisp"
 :type :ql-clpi
 :url "https://quicklisp.common-lisp-project-index.org/")
Configuring ASDF
ASDF needs to be configured to find the clpm-client system. Assuming you
haven't modified your ASDF source registry too much, place the output of the
following command at:
- Linux/MacOS
~.config/common-lisp/source-registry.conf.d/20-clpm-client.conf- Windows
%LOCALAPPDATA%\config\common-lisp\source-registry.conf.d\20-clpm-client.conf
clpm client source-registry.d
Configuring the Client
Configure the client by adding code to your implementation's init file.
Use the following to print the default configuration. Add --help to see
options.
clpm client rc
Default configuration
As of v0.4.1, the recommended configuration is:
;;; Use CLPM with default configuration.
;;;
;;; Generated by CLPM 0.4.1

(require "asdf")
#-clpm-client
(when (asdf:find-system "clpm-client" nil)
  ;; Load the CLPM client if we can find it.
  (asdf:load-system "clpm-client")
  (when (uiop:symbol-call :clpm-client '#:active-context)
    ;; If started inside a context (i.e., with `clpm exec` or `clpm bundle exec`),
    ;; activate ASDF integration
    (uiop:symbol-call :clpm-client '#:activate-asdf-integration)))
This configuration:
- Loads ASDF.
- Loads the CLPM client if its .asd file can be found.
- Activates ASDF integration if launched via
clpm execorclpm bundle exec.
Demo: Using Global Contexts from the REPL
This demo shows you how to use CLPM while interactively developing from the REPL in a global context. Before continuing, please ensure you have installed CLPM and configured the client.
Additionally, clone the clpm-demo project somewhere. (Undoing any changes you made from other demos).
Start your Lisp!
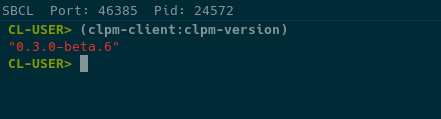
Start your Lisp! You can check the client was loaded and it can find CLPM by evaluating:
(clpm-client:clpm-version)
Start your Lisp!
Syncing sources
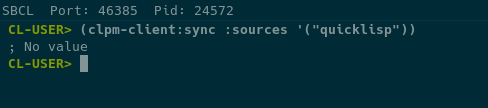
If you are using the Quicklisp distribution directly and have not yet synced it, do so now.
This command will likely take a while as it needs to download data for every version of the distribution. You do not need to do this step if you are using the CLPI mirror.
(clpm-client:sync :sources '("quicklisp"))
Syncing sources
Activating contexts
Assuming you did not launch your Lisp as a child process of clpm bundle
exec or clpm exec (see the CLI demos for more details), the default
configuration does not activate any context.
You can activate or switch contexts using clpm-client:activate-context.
If you switch contexts you will get a continuable error. This is just a warning that things may break unexpectedly (e.g., you have already loaded systems in some context and are now switching to one where they aren't installed or a different version is installed.
Activating contexts
Activate the demo context now by evaluating:
(clpm-client:activate-context "demo" :activate-asdf-integration t)
This queries CLPM for the ASDF configuration for the demo context (source
registry and output translations). Then it configures ASDF in the running
image with those settings. Last, it hooks into ASDF's system search functions
Activating contexts

Installing systems
You can install systems or projects into a context using
clpm-client:install.
The systems are installed into the context specified by
clpm-client:*default-context*. If that is NIL (the default), it installs
into the active context. If there is no active context, it falls back to the
context named default.
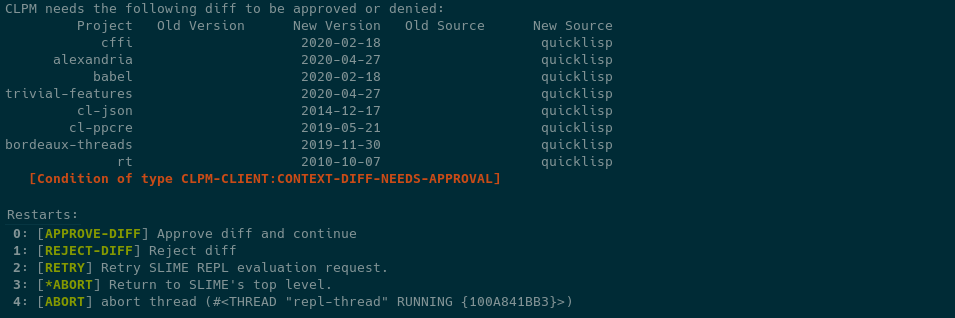
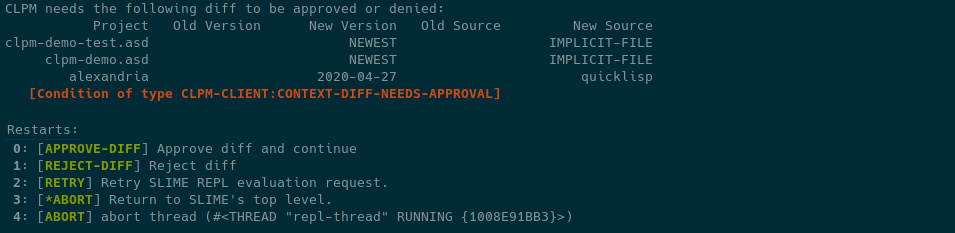
Before modifying the context, CLPM produces a diff and presents it to you
for approval. The presentation is controlled by
clpm-client:*context-diff-approval-method*. It can be set to:
:error- Default. A condition is signaled (using
error, so you will be dropped into the debugger). The restartsapprove-diffandreject-diffwill be available. :yes-or-no-p- The diff is printed and you are asked for approval via
yes-or-no-p. t- The diff is silently accepted.
Installing systems
Install the CFFI project into the demo context by evaluating:
(clpm-client:install :projects "cffi")
Installing systems
Note how this installs every system that is part of the CFFI project (notably pulling in its testing dependencies), instead of only the CFFI system and its dependencies.
Lazily installing systems
Alternatively, if you have an activated context and the client's ASDF
integration activated, you can install systems on demand. This works by
adding a system search function to ASDF, therefore any attempt to find a
system that is not installed (e.g., using asdf:find-system,
asdf:load-system, etc.) will trigger the client.
Lazily installing systems
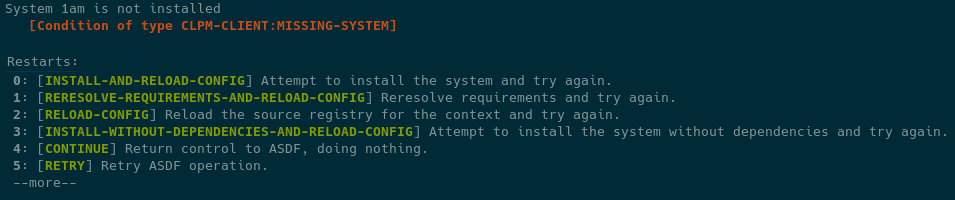
How the client behaves in the presence of a missing system can be configured
by the variable clpm-client:*asdf-system-not-found-behavior*. It can be
set to:
:error- Default. A condition is signaled (using
error, so you will be dropped into the debugger). The restartsinstall-and-reload-config,reresolve-requirements-and-reload-config,install-without-dependencies-and-reload-config, andreload-configwill be available. :install- The client will attempt to install the system and its dependencies without prompting.
:install-without-deps- The client will attempt to install the system without its dependencies without prompting.
nil- The client does nothing.
Lazily installing systems
Note that these settings combine with
clpm-client:*context-diff-approval-method*. Therefore the default behavior
is to ask if the system should be installed and to ask if the diff is
approved (both using the debugger).
Lazily installing systems
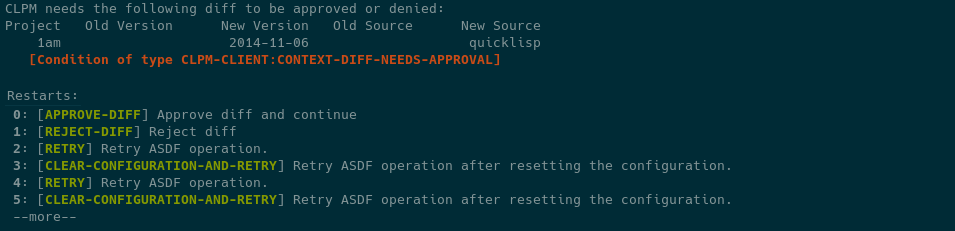
Lazily load 1am by evaluating:
(asdf:load-system "1am")
Invoke the install-and-reload-config restart and then the approve-diff
restart.
Lazily installing systems
Lazily installing systems
Updating
When new versions of your dependencies are released, you can easily update a
context using clpm-client:update. By default, all projects are considered
eligible for upgrading (subject to requirements specified via
install). However, only specific systems or projects can be upgraded by
specifying the :projects and/or :systems arguments.
Updating
To update everything in the demo context, run:
(clpm-client:update)
If you would like to limit the updates to particular systems or projects, use the appropriate keywords. For example:
(clpm-client:update :projects "1am")
This probably won't do anything right now since you already have the latest versions!
Installing an editable system
CLPM allows you to "install" a system into a context using a pointer to the .asd file on your local hard drive. This is great for developing software as you can leave the code in a folder not under CLPM's control, but CLPM will still examine it to determine and install dependencies.
Installing an editable system
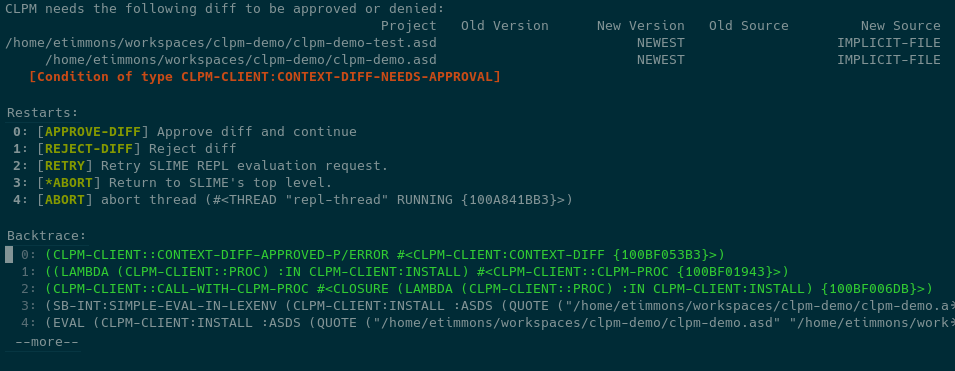
Install the clpm-demo project into the demo context by evaluating:
(clpm-client:install :asds '("/path/to/clpm-demo/clpm-demo.asd"
"/path/to/clpm-demo/clpm-demo-test.asd"))
Then load the system by evaluating:
(asdf:load-system :clpm-demo)
Installing an editable system
Adding a dependency to an editable system
Look at clpm-demo-test.asd and test.lisp. We have a test suite defined
using fiveam, but we forgot to declare a dependency! Add fiveam to the
:depends-on for the clpm-demo-test system:
(defsystem #:clpm-demo-test
:version "0.1.0"
:description "CLPM Demo Test System"
:license "BSD-2-Clause"
:depends-on (#:fiveam #:clpm-demo)
:components
((:file "test")))
Adding a dependency to an editable system
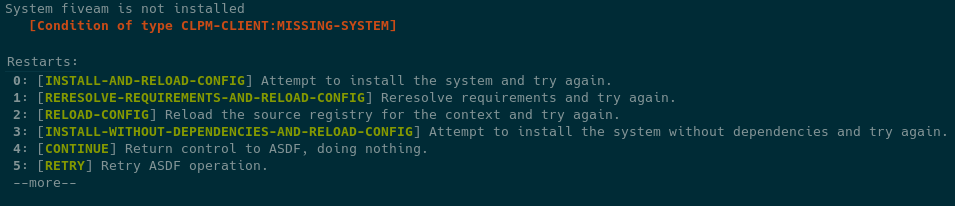
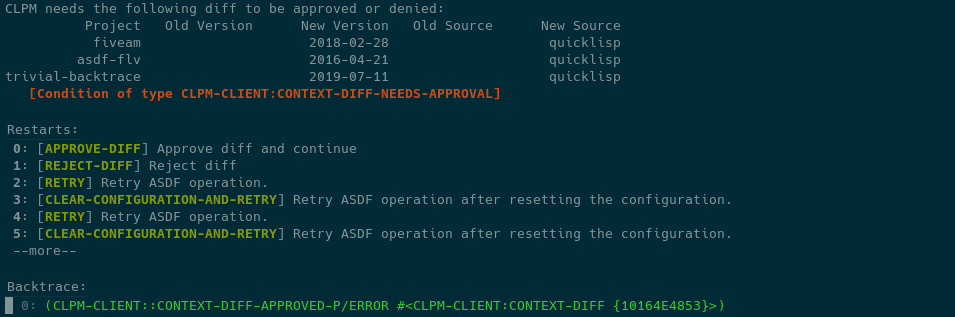
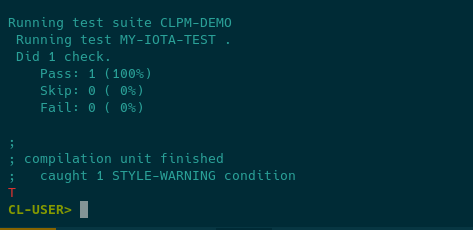
Now let's run the tests by evaluating:
(asdf:test-system :clpm-demo)
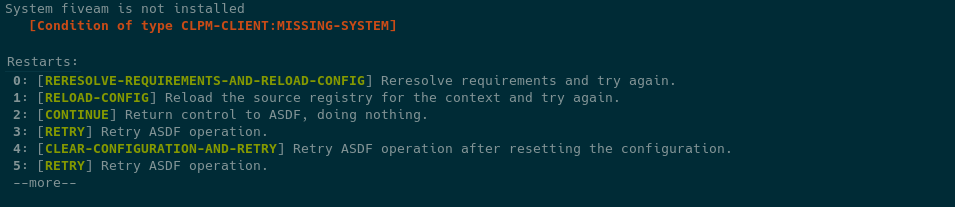
Uh oh, we don't have fiveam installed! This is the perfect time to use the
reresolve-requirements-and-reload-config restart. It will notice the new
dependency and ask you to install it. Accept the diff and watch the test
pass.
Adding a dependency to an editable system
Adding a dependency to an editable system
Adding a dependency to an editable system
Demo: Using Bundles from the REPL
This demo shows you how to use CLPM while interactively developing from the REPL in an anonymous, project specific context (bundle). Before continuing, please ensure you have installed CLPM and configured the client.
Additionally, clone the clpm-demo project somewhere. (Undoing any changes you made from other demos).
Start your Lisp!
Start your Lisp! You can check the client was loaded and it can find CLPM by evaluating:
(clpm-client:clpm-version)
Start your Lisp!

Creating the bundle
A bundle is a project specific context defined by two files.
clpmfile is generated and maintained by the developer. It contains the
sources and requirements for the bundle.
The second, clpmfile.lock is generated by CLPM. It contains a copy of the
information from the clpmfile, as well as a list of releases that satisfy
the requirments. Additionally, it contains a dependency tree. This is not
currently used by CLPM, and at the moment is purely to provide the developer
information.
Creating the bundle
Initialize a new clpmfile for the clpm-demo project by evaluating:
(clpm-client:bundle-init #p"/path/to/clpm-demo/clpmfile"
:asds '("clpm-demo.asd" "clpm-demo-test.asd"))
This creates a new file named clpmfile at /path/to/clpm-demo/clpmfile. It
should contain the following:
;;; -*- Mode: common-lisp; -*-
(:api-version "0.3")
(:source "quicklisp" :url "https://beta.quicklisp.org/dist/quicklisp.txt" :type :quicklisp)
(:asd "clpm-demo.asd")
(:asd "clpm-demo-test.asd")
Creating the bundle

Installing the bundle
Before you can use the new bundle, you need to install the dependencies! You
can do this using clpm-client:install. As you do not have an active
context yet, you need to specify the context.
When specifying a bundle as the context, it is required that you use a pathname!
Installing the bundle
Install all the dependencies for the bundle. Don't forget the #p!
(clpm-client:install :context #p"/path/to/clpm-demo/clpmfile")
Installing the bundle
Activating the bundle
Once you have a lock file, you can activate the context specified by the
bundle using clpm-client:activate-context.
If you switch contexts you will get a continuable error. This is just a warning that things may break unexpectedly (e.g., you have already loaded systems in some context and are now switching to one where they aren't installed or a different version is installed.
Activating the bundle
Activate the bundle and the ASDF integration by evaluating:
(clpm-client:activate-context #p"/path/to/clpm-demo/clpmfile"
:activate-asdf-integration t)
And load the system:
(asdf:load-system :clpm-demo)
Activating the bundle

Test the system
Look at clpm-demo-test.asd and test.lisp. We have a test suite defined
using fiveam, but we forgot to declare a dependency! Add fiveam to the
:depends-on for the clpm-demo-test system:
(defsystem #:clpm-demo-test
:version "0.1.0"
:description "CLPM Demo Test System"
:license "BSD-2-Clause"
:depends-on (#:fiveam #:clpm-demo)
:components
((:file "test")))
Test the system
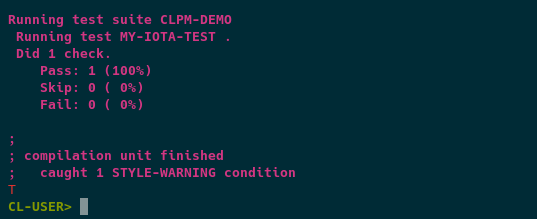
Now run the tests by evaluating:
(asdf:test-system :clpm-demo)
Uh oh, we don't have fiveam installed! This is the perfect time to use the
reresolve-requirements-and-reload-config restart. It will notice the new
dependency and ask you to install it. Accept the diff and watch the test
pass.
Test the system
Test the system
Installing projects from VCS
Now, let's say you decide that there's a feature in Fiveam's git repository
you want to use, but it hasn't been released to Quicklisp yet. No worries!
Add the following to the clpmfile:
(:github "fiveam"
:path "sionescu/fiveam"
:branch "master")
Installing projects from VCS
And reinstall the context (so it gets the new requirement):
(clpm-client:install :context #p"/path/to/clpm-demo/clpmfile")
The diff will show you that it is changing from a released version of fiveam to a specific commit from the git repo.
Installing projects from VCS
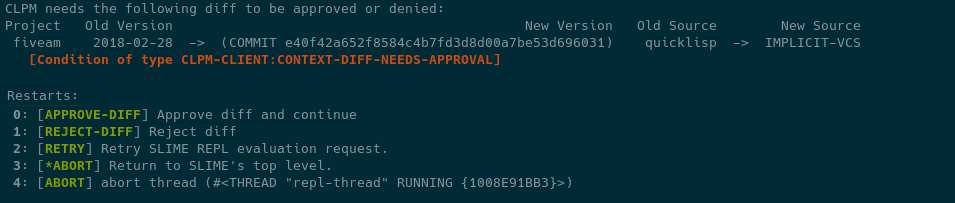
Installing projects from VCS
If you retest clpm-demo now, you'll see that it recompiles fiveam using
files from a different location.
(let ((asdf:*compile-file-failure-behaviour* :ignore))
(asdf:test-system :clpm-demo))
The binding for *compile-file-failure-behavior* was required at the time
of writing as FiveAM's master branch had a package definition in variance
with the one in the version released in Quicklisp.
Overriding VCS repos
Last, let's say you discover a bug in fiveam and want to use a local copy of
fiveam in your bundle while you fix it. This can be accomplished by cloning
the fiveam repo next to the clpm-demo folder and adding the following to
clpm-demo/.clpm/bundle.conf:
;;; -*- mode: common-lisp; -*-
(version "0.2")
((:bundle :local "fiveam")
"../fiveam/")
This tells CLPM that if it encounters a VCS requirement for fiveam, it
should be satisfied using the repository located at ../fiveam/ (relative
to the clpmfile).
Overriding VCS repos
Overriding VCS repos
Reinstall the context (so it gets the new override):
(clpm-client:install :context #p"/path/to/clpm-demo/clpmfile")
In the current diff format, you want see an entry on the diff, but you still need to approve it for the change it take effect in the current session. This will hopefully be made more clear in v0.4.
Overriding VCS repos

Overriding VCS repos
Using this feature requires great care. If you commit a version of
clpmfile.lock that references a fiveam commit that you have not pushed,
all of your collaborators will have a bad day and blame it on you!
Demo: Using CLPM from the CLI
This demo shows off a subset of CLPM's capabilities that can be accessed using its command line interface.
Most of what was described in previous demos will also work from the CLI and
now that you know the concepts, the details can hopefully be figured out by
adding --help to any invocation of clpm.
A feature of CLPM that is currently unique to its CLI is the exec
interface. That is described below.
Executing a process in a global context
If you would like to use CLPM but not have to deal with the client, you can start processes with environment variables set that allow ASDF to be configured using CLPM without the client.
Executing a process in a global context
For example, to run an sbcl process with ASDF configured to use systems
installed in the demo context, run the following command:
clpm exec --context=demo -- sbcl
The -- is not required, but highly recommended as it keeps CLPM from
trying to parse any options given to SBCL as options for CLPM.
This sets the CL_SOURCE_REGISTRY and ASDF_OUTPUT_TRANSLATIONS
environment variables to configure ASDF, along with some others in case you
choose to load the client in the new process.
Executing a process in a bundle
If you would like to execute a command with the environment configured to use a CLPM bundle, instead run:
clpm bundle exec -- sbcl
It defaults to finding clpmfile in the current directory, but that can be
overriden with -f.